
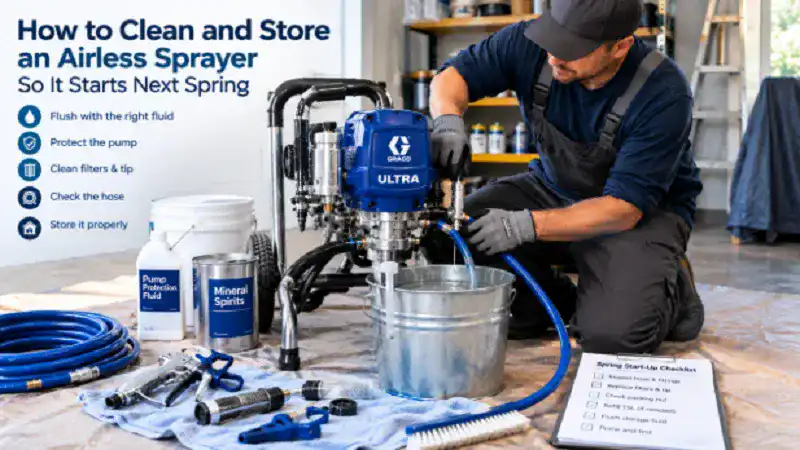
Most airless sprayers do not wear out over the winter. They get damaged in the winter: a pump that froze with water in it, paint that dried hard in the intake valve, a hose that was folded and left in a cold shed. The cost shows up in spring, when the sprayer will not prime, leaks at the packing nut, or refuses to hold pressure- just when you want to start the first job of the season.
A clean, protected sprayer takes about half an hour to put away and starts without drama in spring. This guide covers the cleaning and storage steps in the right order, with the specific guidance that sprayer manufacturers give for flushing fluids, pump protection and cold weather. It also includes a spring start-up checklist so that you find any problem in the shop rather than on the job.
Key takeaways
- Relieve the pressure first, and flush with the right fluid for your paint: water for latex, mineral spirits for oil-based coatings.
- If you flush with water, flush again with mineral spirits or pump protection fluid before storage.
- Never leave water or water-based paint in the pump in cold weather. It can freeze and damage the pump.
- Clean the tip, the gun filter and the inlet strainer, and refill throat seal liquid if your pump uses it.
- In spring, check the packings, hose, and filters before the first job, not during it.
What you will need
- A grounded metal pail for flushing
- Water (for latex paint) or mineral spirits (for oil-based coatings)
- Pump protection fluid, or mineral spirits if your manual recommends it
- Throat seal liquid, if your pump uses it
- A soft brush, a rag, and a bucket for cleaning the tip and filters
- Your sprayer manual, open to the cleanup and storage pages
One caution before you start: different models have slightly different cleanup procedures, and the manual is the final word for yours. What follows is the common sequence.
Step 1: Relieve the pressure
An airless sprayer stays under pressure after you switch it off. Turn it off, lock the gun, turn the pressure control to its lowest setting and trigger the gun into a grounded metal pail to bleed the pressure. Then open the prime or drain valve as your manual directs. Graco’s manuals say to relieve the pressure whenever you stop spraying and before you clean, check or service any part. Never put a hand over the tip or the gun.
Step 2: Flush the system with the right fluid
Flush until the fluid comes out of the drain tube and the gun is clean.
- Latex or water-based paint:flush with clean water.
- Oil-based paint, stains or solvent-based coatings: flush with mineral spirits or the solvent your coating maker recommends.
Do not mix incompatible fluids. Titan’s manuals warn that incompatible fluids can cause valves to stick closed, so flush with a fluid that is compatible with the coating you were spraying. Work in a ventilated space, away from ignition sources, whenever you use solvents.
Step 3: Protect the pump
This is the step that most often decides whether a sprayer starts in spring. If you flushed with water, Graco’s instructions are to flush again with mineral spirits or a pump protection fluid. This protects against corrosion and freezing. Titan’s guidance is similar: mineral spirits for long-term or cold-weather storage, and water with a protective additive for short-term storage of latex only. Never store a sprayer under pressure.
Graco also says plainly never to leave water or water-based paint in the pump in cold weather. Water that freezes expands, and a cracked cylinder or a damaged valve is a much more expensive repair than a bottle of pump protection.
| What you sprayed | Flush with | Before storage |
| Latex or water-based paint | Clean water | Flush again with mineral spirits or pump protection fluid, as your manual directs |
| Oil-based paint or stain | Mineral spirits | Leave the pump filled with mineral spirits or pump protection fluid, per your manual |
| A short break of a few days (latex only) | Clean water | Some manufacturers allow water with a protective additive for short-term storage; check your manual |
Step 4: Clean the gun, the tip and the filters
- Remove the tip and the tip guard and clean them with a soft brush and the flushing fluid. A tip that is stored dirty is the tip that clogs on day one.
- Open the gun filter. Graco’s guidance is to clean it after each use and replace it if the mesh has holes.
- Take off the inlet strainer and clean or replace it.
- Check the manifold or outlet filterand clean it.
- Wipe downthe pump, the frame, and the hose.
Step 5: Refill the throat seal liquid
Many pumps use throat seal liquid (TSL) in the packing nut. It stops paint drying onto the rod and packings. Graco’s instructions are to fill the nut each time you spray and to check it regularly. If your sprayer uses it, refill it before storage so the packings are not left to dry out. Some models, such as Graco’s Magnum range, do not use TSL and rely on pump protection fluid after use.
Step 6: Look after the hose
Hoses are often the first thing to fail in spring because they are stored badly. Coil the hose in loose loops, not tight ones, and avoid sharp folds. Store it off the floor in a space where it will not freeze. Before you put it away, run your hand along the length and look for cracks, kinks, and bulges. A damaged hose can fail under pressure, so replace it now rather than discover it in spring. If you need one, airless paint hoses are available in several lengths and diameters; check that the working pressure rating matches your sprayer.
Step 7: Store the sprayer properly
- Keep it indoors and above freezing, even though the pump is protected. Cold is hard on seals and hoses.
- Cover it to keep dust off the fittings and the motor vents.
- Keep the cord and plug dry, and coil the power cord loosely.
- Tag itwith the date you last serviced it and what is in the pump. A note on the handle saves guesswork in spring.
Spring start-up: check before the first job
In spring, give the sprayer a ten-minute inspection in the shop, not on the job site.
- Inspect the hose and the fittings for cracks or stiffness.
- Replace the filters if they are stained or damaged, and check the tip.
- Look at the packing nut. If you find dried paint or signs of leakage, the packings need attention.
- Refill the TSL if your pump uses it.
- Flush the storage fluid out with the fluid that suits your first coating. Follow your manual for the sequence.
- Prime and test. With the prime valve open, let the fluid circulate until it runs clean, then switch to spray on a test strip and check the pressure and the pattern.
If something does not look right, the spring check is the cheapest time to fix it. Worn packings, tired O-rings, and a cracked hose are all inexpensive to replace in the shop. A supplier such as eRepairCenter lists replacement parts for Graco-compatible sprayers by system (pump, filters, gun, and hose), so you can match a part by the OEM number and your model. Confirm the fit by the model number on your machine before you order.
Common storage mistakes
- Leaving water or latex in the pump over winter. This is the most expensive mistake.
- Skipping the second flush after cleaning with water.
- Storing the sprayer under pressure. Always relieve the pressure first.
- Folding the hose tightly or hanging it from a nail in a cold shed.
- Forgetting the filters. Dirty filters dry out and are harder to clean in spring.
- Not writing down what is in the pump. It makes spring start-up guesswork.
Frequently asked questions
How do I winterize an airless sprayer?
Relieve the pressure, flush with the right fluid for your paint, then flush again with mineral spirits or pump protection fluid so there is no water left in the pump. Clean the tip, the gun filter, and the inlet strainer, refill throat seal liquid if your pump uses it, and store the sprayer somewhere dry and above freezing.
Can I leave paint in the sprayer overnight?
For a short break, many people do, but the right answer depends on the coating and the sprayer. Check your manual and your coating maker’s instructions. For latex, water-based paint can dry in the pump and valves, and in cold weather it can freeze. When in doubt, flush.
What is pump protection fluid?
It is a storage fluid designed to protect the inside of the pump from corrosion and freezing. Graco refers to it in its cleanup instructions for water-flushed pumps, and other manufacturers have similar products. Use the type your manual names.
What should I replace before putting the sprayer away?
Anything that is damaged or worn: a torn gun filter, a clogged inlet strainer, a cracked O-ring, a stiff hose. If the packing nut was leaking last season, replace the packings now so that you start spring with a sound pump.
If the sprayer was stored badly: what to check
Not every sprayer gets the careful treatment above. If you are pulling one out of a shed that you did not put away yourself, assume nothing and look before you plug it in.
- Look for cracks and weeping around the pump body, the fittings, and the filter housings. Frost damage often shows up as a hairline crack or a slow seep.
- Check the hose first. A hose that is stiff, flattened, or cracked should be replaced, not tested under pressure.
- Turn the pump by hand if your manual allows it, or watch the first few strokes at the lowest pressure. A pump that is hard to move may have dried paint inside.
- Check the prime valve and the inlet strainer for dried paint, which is a common reason a stored sprayer will not prime.
- Replace the packings if paint has dried in the pump. Graco’s manuals say to replace the packings in that case, and to thaw a frozen pump completely before starting it.
Treat the first test as a diagnostic, not a job. Run clean flushing fluid through the machine at low pressure, watch for leaks, and only then load it with paint.
A simple storage log
A small note taped to the sprayer saves guesswork. Write the date, what the pump was last flushed with, whether it holds pump protection fluid, and anything you noticed, such as a slow leak at the packing nut or a hose you meant to replace. In spring, the note tells you what to do first, and it makes it easier to decide which parts to order before the season starts, rather than in the middle of the first job.
The short version
Relieve the pressure, flush with the right fluid, protect the pump, clean the filters and tip, refill the throat seal liquid and store the sprayer dry and above freezing. Thirty minutes of care in the fall prevents most of the problems that make a sprayer difficult to start in spring. Then, when the season arrives, a ten-minute check in the shop means the first job of the year starts on time.
About the author
The eRepairCenter parts team helps painters, contractors, and maintenance crews identify and replace worn parts on airless paint sprayers. eRepairCenter is a Houston, Texas supplier of aftermarket, used, and surplus replacement parts and an authorized Bedford Precision distributor, shipping across the United States. See more